|
Wheeler Professional Laser Bore Sighter By Chuck Hawks 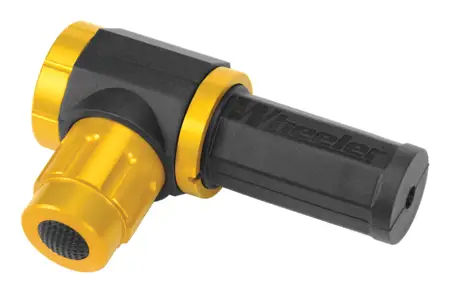 Each year our friends at Battenfeld Technologies, owner of Wheeler Engineering, Caldwell and other famous names in shooting accessories, send along some new products for our perusal. Among the most interesting products this year is the Wheeler Professional Laser Bore Sighter. This uses a daylight visible green laser to make bore sighting a riflescope fast and easy. Bore sighting does not, of course, mean that your rifle is sighted-in; it is not. Correctly bore sighting a rifle gets the scope aligned with the bore. It does not account for the barrel vibrations that occur when a rifle is actually fired, nor the recoil of the cartridge, or the shooter's individual method of holding the rifle. The result of correctly bore sighting a rifle is that the first shot should be on the target paper at 25 yards. From that point on, you adjust your scope for the correct point of impact by actually shooting, first at 25 yards and then at 100 yards (or longer), just like always. I mention this because, judging by e-mail questions I have received, there seems to be some confusion between bore sighting (the first step in sighting-in a rifle) and actually sighting-in a rifle, which always requires actually shooting the rifle and adjusting the sights accordingly. The Professional Laser Bore Sighter (PLBS) is packaged in a convenient, foam lined, plastic box. At the back of the bore sighter is a powerful magnet that sticks the bore sighter to the barrel of a rifle. At the front of the PLBS is the green laser and at the bottom is the battery case with a push button on/off switch. The body of the bore sighter is machined from aluminum and anodized a light gold color. It gives every appearance of being a high quality product. Here are the features claimed for the Wheeler Professional Laser Bore Sighter:
Worth emphasizing is that every Laser Bore Sighter is hand tuned with a series of set screws that drive the laser module housed inside the aluminum housing. Once it is calibrated (less than three MOA of runout relative to the perpendicular plane of the rear magnet) an epoxy is injected to fill the void space around the laser module, permanently locking it into calibration. The result is more precision and more accuracy than optical bore sighters. I found the Wheeler Professional Laser Bore Sighter easy to use and it works exactly as claimed. Simply follow the included directions for best results. Briefly, what you do first is carefully place the PLBS on the muzzle of your rifle in line with the bore. Hold it securely to prevent it from forcefully impacting the muzzle face. (The magnet is powerful!) It is easiest to place the magnet end carefully against the edge of the muzzle and slowly rock it over onto the muzzle face. Perfectly centering the PLBS is not critical, just get it reasonably close. Set up a target 25 yards from the muzzle of the rifle. Use a light colored or reflective target for best visibility of the laser dot. Place the rifle in a rest so that it stays put. I used a Caldwell Lead Sled, but any sort of rest will do, even an empty cardboard box with a couple of "V" shaped cuts in the ends to hold the rifle. Note the vertical distance between your line of sight and the center of the barrel's bore. (This is usually 1.5-2.0 inches for scopes and optical sights and about �" for iron sights.) Turn on the laser and adjust the position of the rifle to get the laser dot on the target. Adjust your scope or sights so that the point of aim is � of the distance between your sight line and the bore, directly above the laser dot on the target. For example, if your scope is 1.5" above the bore of your rifle, adjust your scope's crosshair so that it is aimed 0.75" directly above the green laser dot at 25 yards. Your firearm is now bore sighted. Turn off the laser and remove the PLBS from the muzzle. After bore sighting, verify the point of impact at 25 yards by actually shooting. Then move back to at least 100 yards for the final sighting-in of your rifle. Your initial group at 100 yards should be reasonably close to your point of aim, making your final scope or sight adjustment easy. |